choreloop › Guides › Home Maintenance › Inspect & Re-Caulk Tubs, Showers & Sinks
Inspect & Re-Caulk Tubs, Showers & Sinks
BathroomBathroomsSeasonalEvery 6 months
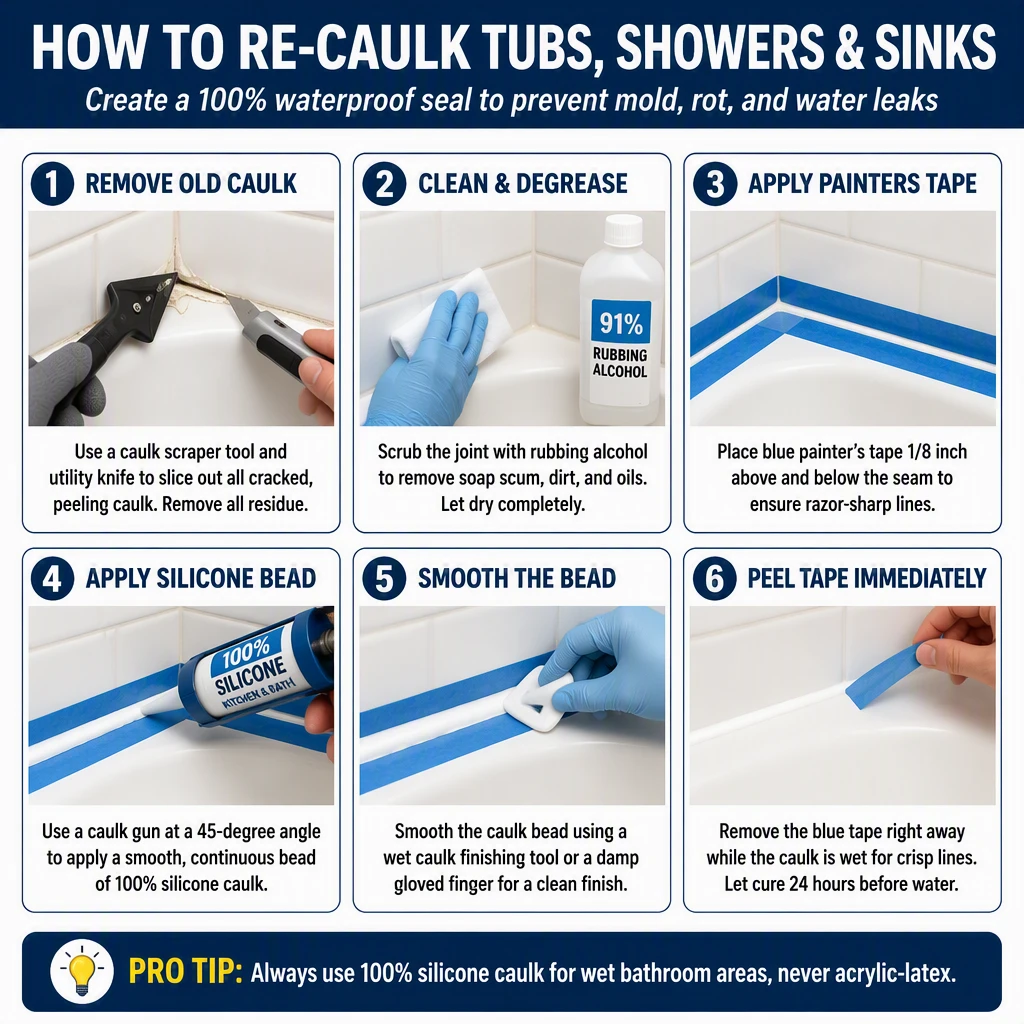
Remove old cracking caulk and reseal seams around tubs, showers, and sinks to prevent water damage, mold, and rot behind walls.
Supplies You'll Need
- Silicone caulk remover tool or utility knife
- New mildew-resistant silicone caulk (matching color)
- Caulk gun
- Rubbing alcohol or denatured alcohol
- Paper towels and painter's tape
⚠️ Safety Warnings
- Ventilate the bathroom well when working with caulk removers — fumes can be strong.
- Use only 100% silicone caulk in wet areas, not acrylic-latex blends.
Step-by-Step Instructions
- Inspect all tub, shower, and sink seams for cracking, peeling, or moldy caulk.
- Apply caulk remover along any old bead and let sit 15-30 minutes.
- Scrape out the old residue with a utility knife or caulk removal tool.
- Scrub the clean seam with rubbing alcohol and wipe dry with paper towels.
- Apply blue painter's tape along both sides of the seam for a clean line.
- Run a bead of fresh silicone caulk along the seam with a steady hand.
- Smooth the bead with a wet finger or finishing tool, remove excess, and remove painter's tape before it dries.
💡 Pro Tips
- Smooth fresh caulk with a wet finger or caulk finishing tool for a professional watertight seal.
- Address moldy caulk before it spreads to the drywall behind the tile.
Track this chore automatically
choreloop reminds you when it's due — free, no account needed.
Open choreloop
choreloop reminds you when it's due — free, no account needed.
Open choreloop